
Inviting participants to a round
Welphi makes it very easy to invite participants and track their progress. Inviting participants, sending reminders to participants with uncompleted questionnaires, or to those who have not started yet, is just a click away.
Overview
There are four possible ways to invite your participants into your questionnaire:
- Invite participants to your questionnaire from within Welphi
- Invite participants from your own e-mail client
- Use Welphi without inserting the participants' real e-mail address
- Share a universal link
Inviting participants from within Welphi
The easiest and most practical way to invite participants is to do so directly from within the platform. Along with its monitoring features, getting people to answer and tracking the progress of your participants is as easy as it gets.
Before you start
- Start your round – don't forget to click "START" on the "Round details" screen before sending e-mails to participants.
- E-mail addresses – to send invitation or reminder e-mails from within Welphi, you need each participant's e-mail address in the participants list. See below for ways to invite participants without entering their e-mail addresses into Welphi.
Note: to learn how these participants were added to your study, see Adding and managing participants.
Open the Round status and Invitations page
- Open the round.
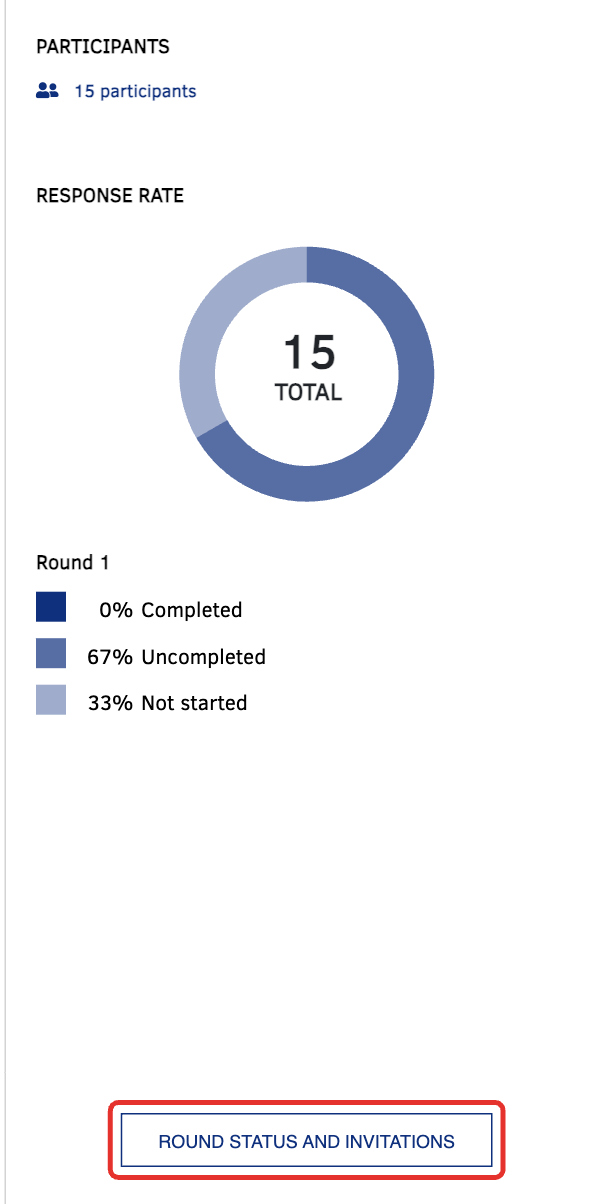
- Click the "ROUND STATUS AND INVITATIONS" button at the bottom of the panel on the right-hand side of the "Round details" screen.
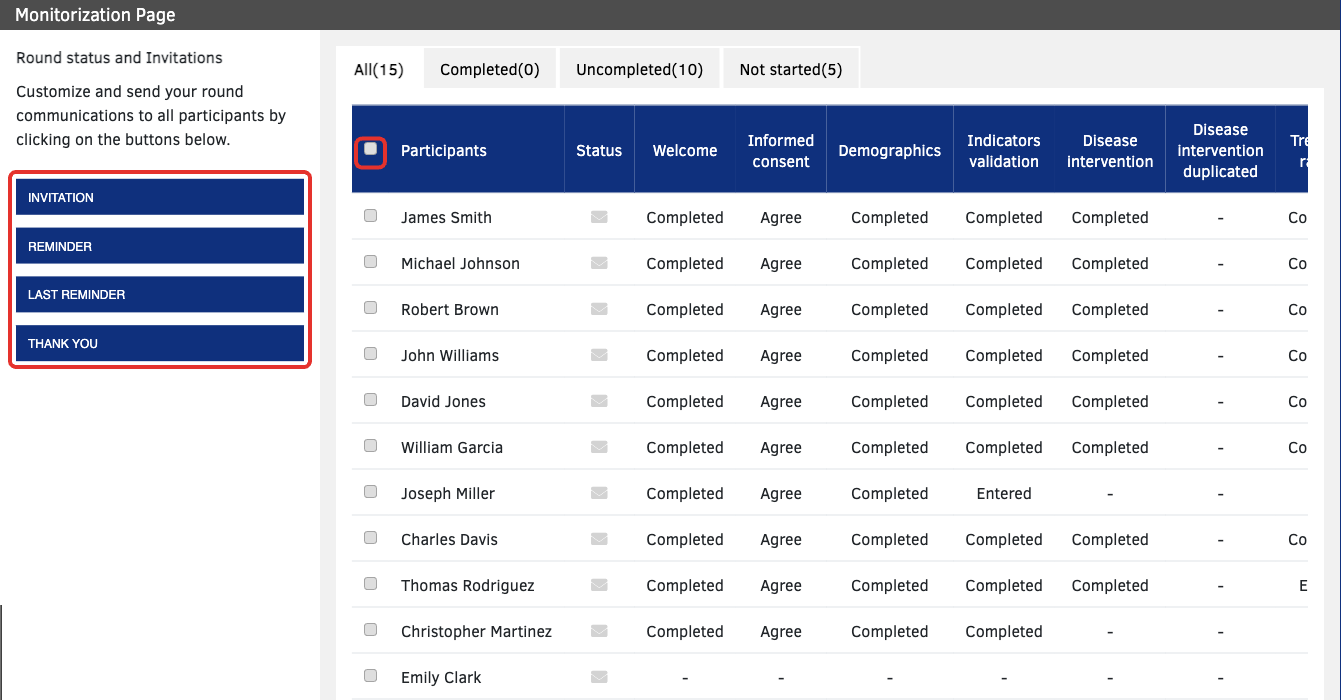
This opens the "Round status and Invitations" page, with the list of all participants in the round.
Select the participants
First select who will receive the e-mail:
- Some participants – check the box next to their names.
- Everyone – check the box at the top of the list, next to "Participants".
- A group – use the tabs above the list ("All", "Completed", "Uncompleted", "Not started") to find a group of participants first.
Write and send the e-mail
- In the panel on the left, click the e-mail you want to send: "INVITATION", "REMINDER", "LAST REMINDER" or "THANK YOU". The e-mail window opens.
- Edit the subject and the message. Welphi provides a default text that you can use.
- Click "SAVE" to keep the text.
- When ready, click "SEND" to send the e-mails to the selected participants immediately. Click "CLOSE" to leave the window without sending.
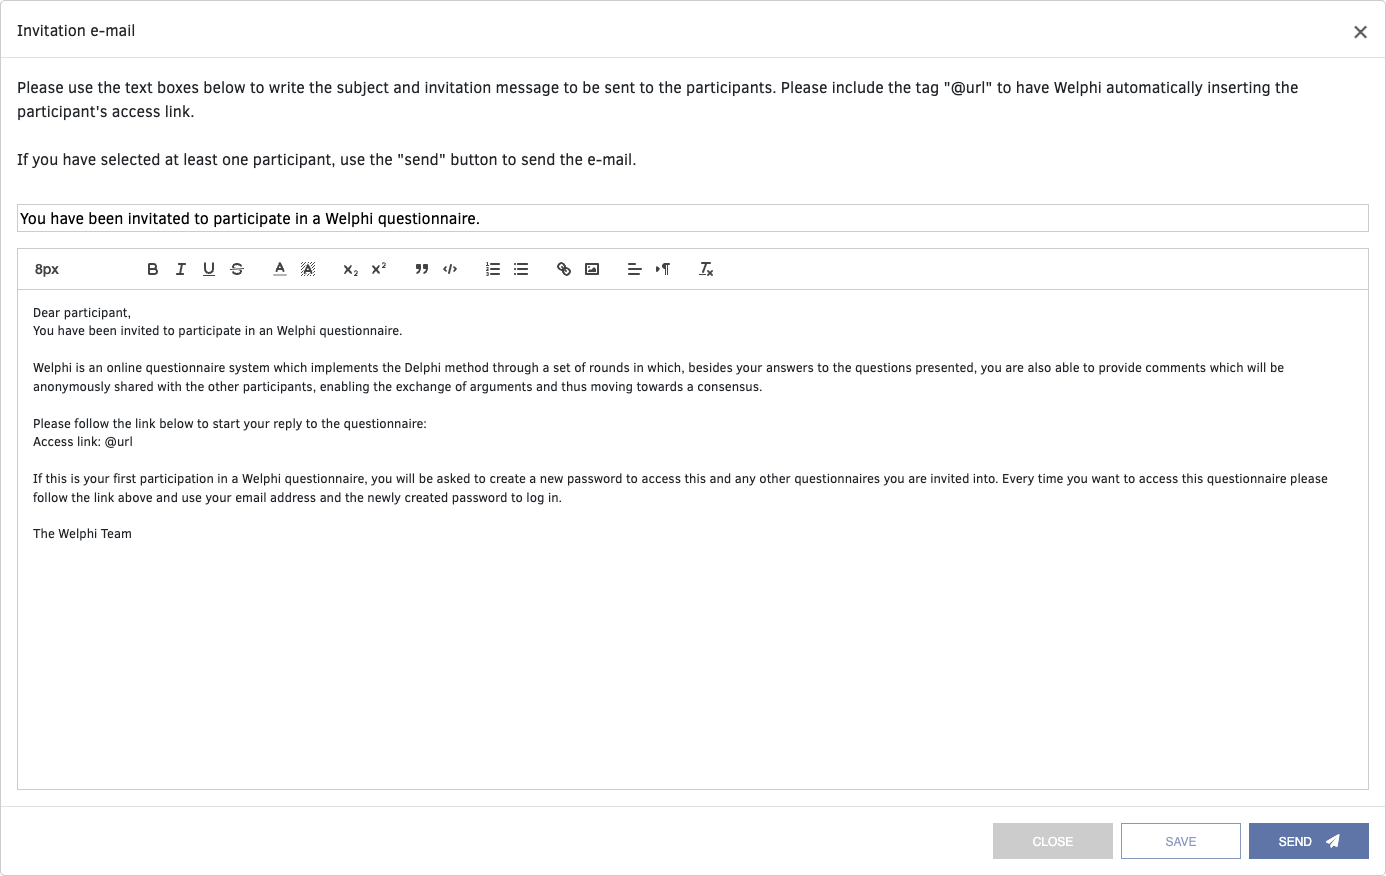
Please note that you must always keep the "@url" tag in your text: Welphi replaces it with each participant's personal link to the questionnaire.
Each participant has a unique link that Welphi creates automatically and inserts into the e-mails. If you need the access links, click "LOAD PARTICIPANTS LINKS" on the same page (see Inviting participants using your own e-mail client below).
Track your participants
Once you have sent your e-mails, you can track who has opened them and who has started the questionnaire. To learn more, see Following invitations and participants' progress.
The "Full" view of the participants page also shows, for each round, when each participant was invited by e-mail.
Inviting participants using your own e-mail client
E-mails sent from Welphi arrive in your participants' mailboxes from the address no-reply@welphi.com. You may prefer to send the invitations yourself, from your own mailbox or another means of contact.
Why send the invitations yourself
- Delivery – although we do our best to deliver your message to the inbox, your participants may recognise an e-mail from your own address more easily.
- Data protection – Welphi and all study data are hosted in the EU. The only processing outside the EU concerns e-mails sent from within Welphi (invitations, reminders and account e-mails). These are delivered by Mailchimp in the United States, under the EU–U.S. Data Privacy Framework, with the EU Standard Contractual Clauses in addition. If you send the invitations yourself, no participant data is passed to Mailchimp.
Send the links yourself
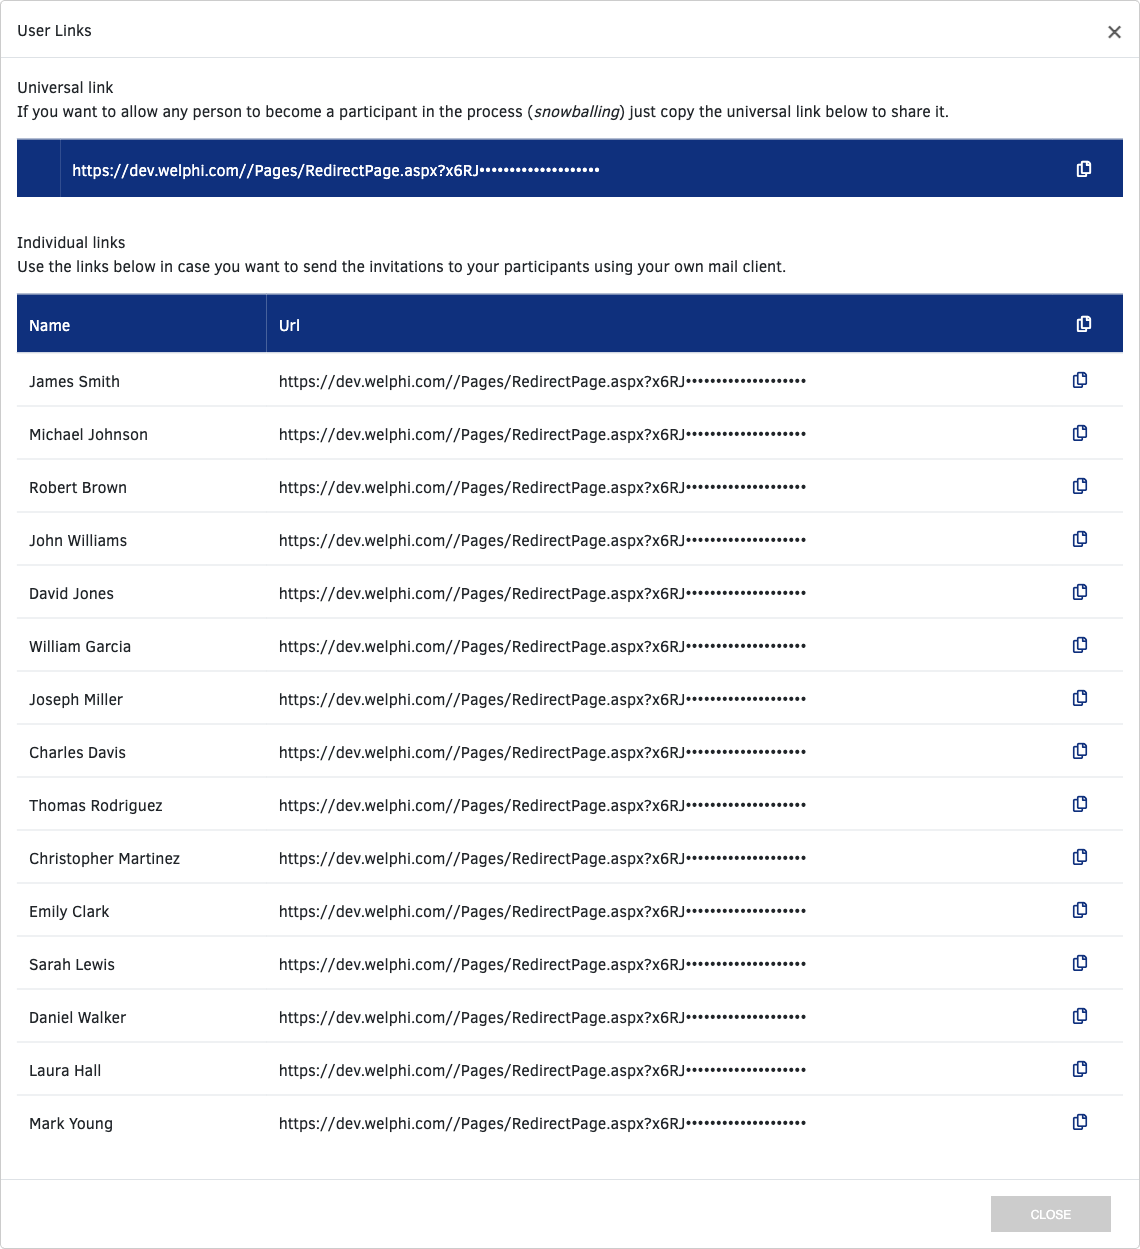
- Click "LOAD PARTICIPANTS LINKS" on the "Round status and Invitations" page.
- In the "User Links" window, find each participant's individual link under "Individual links".
- Send each participant their link using whichever contact method you prefer.
You will still be able to track the progress of each participant. Learn how in Following invitations and participants' progress.
Inviting participants without inserting their e-mail addresses in Welphi
Even though Welphi encrypts e-mail addresses and participant names, as well as all the information you and your participants send to the platform, sometimes you may need to go the extra mile to protect sensitive data.
If you do not want to save the participants' real names and e-mail addresses in Welphi, you can create "placeholder" e-mails:
- Create an Excel file to save your participants' real names and addresses.
- For each participant, create a placeholder e-mail address and name, something like "participant1@myproject.com".
- Insert the placeholder e-mail addresses and names into Welphi.
- Share each participant's direct access link using your own e-mail account or another tool you use to contact your participants.
The placeholder e-mail address doesn't need to exist outside Welphi, since participants receive a direct access link that you share yourself.
This Excel file now holds the link between each participant's real data and the placeholder information you inserted into Welphi.
Share a universal link
Sometimes you may want to allow anyone to answer your questionnaire, even without knowing their name and e-mail address. You can use a universal link and share it on your social networks, or even ask participants to invite others (snowballing).
This works even if you have already added some participants to your study.
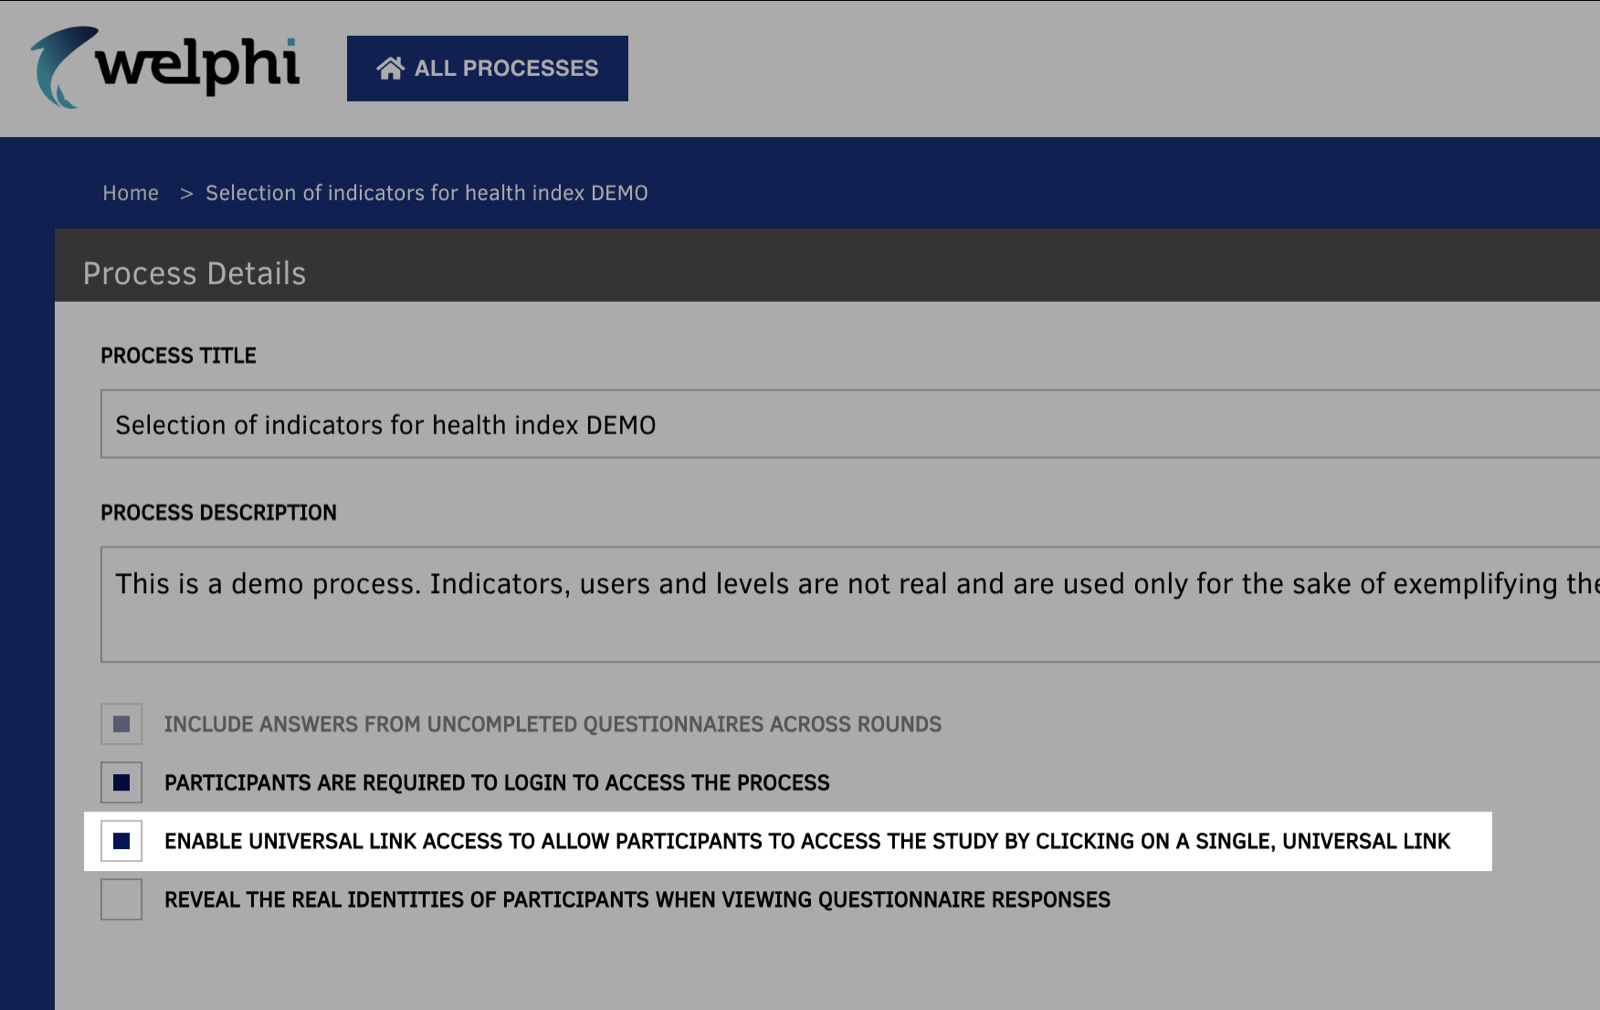
Turn on the universal link
- Open your process page (click the name of your process on the home page).
- Check the option "Enable universal link access to allow participants to access the study by clicking on a single, universal link".
Copy the universal link
- Open the round on the home page.
- Click "ROUND STATUS AND INVITATIONS".
- Click "LOAD PARTICIPANTS LINKS".
- Copy the universal link at the top of the "User Links" window, under "Universal link".
Please keep in mind that participants using the universal link will be asked to provide an e-mail address and create a password to proceed. See Opening a questionnaire with a universal link.