
Adding and managing participants
In Welphi, each process needs a list of the participants you want to invite to one or more rounds of your questionnaire. This article shows you how to build and manage that list.
Overview
- Custom fields – extra information about each participant.
- Adding participants one by one – type each participant's details.
- The participants list – views, search and participation in rounds.
- Importing participants from a CSV file – add a long list at once.
Opening the Participants page
The participants list is managed on the process page:
- Click the process name on the home page.
- Click the "participants" link (for example "0 participants") at the bottom of the screen. The same link is also on the "Round details" screen.
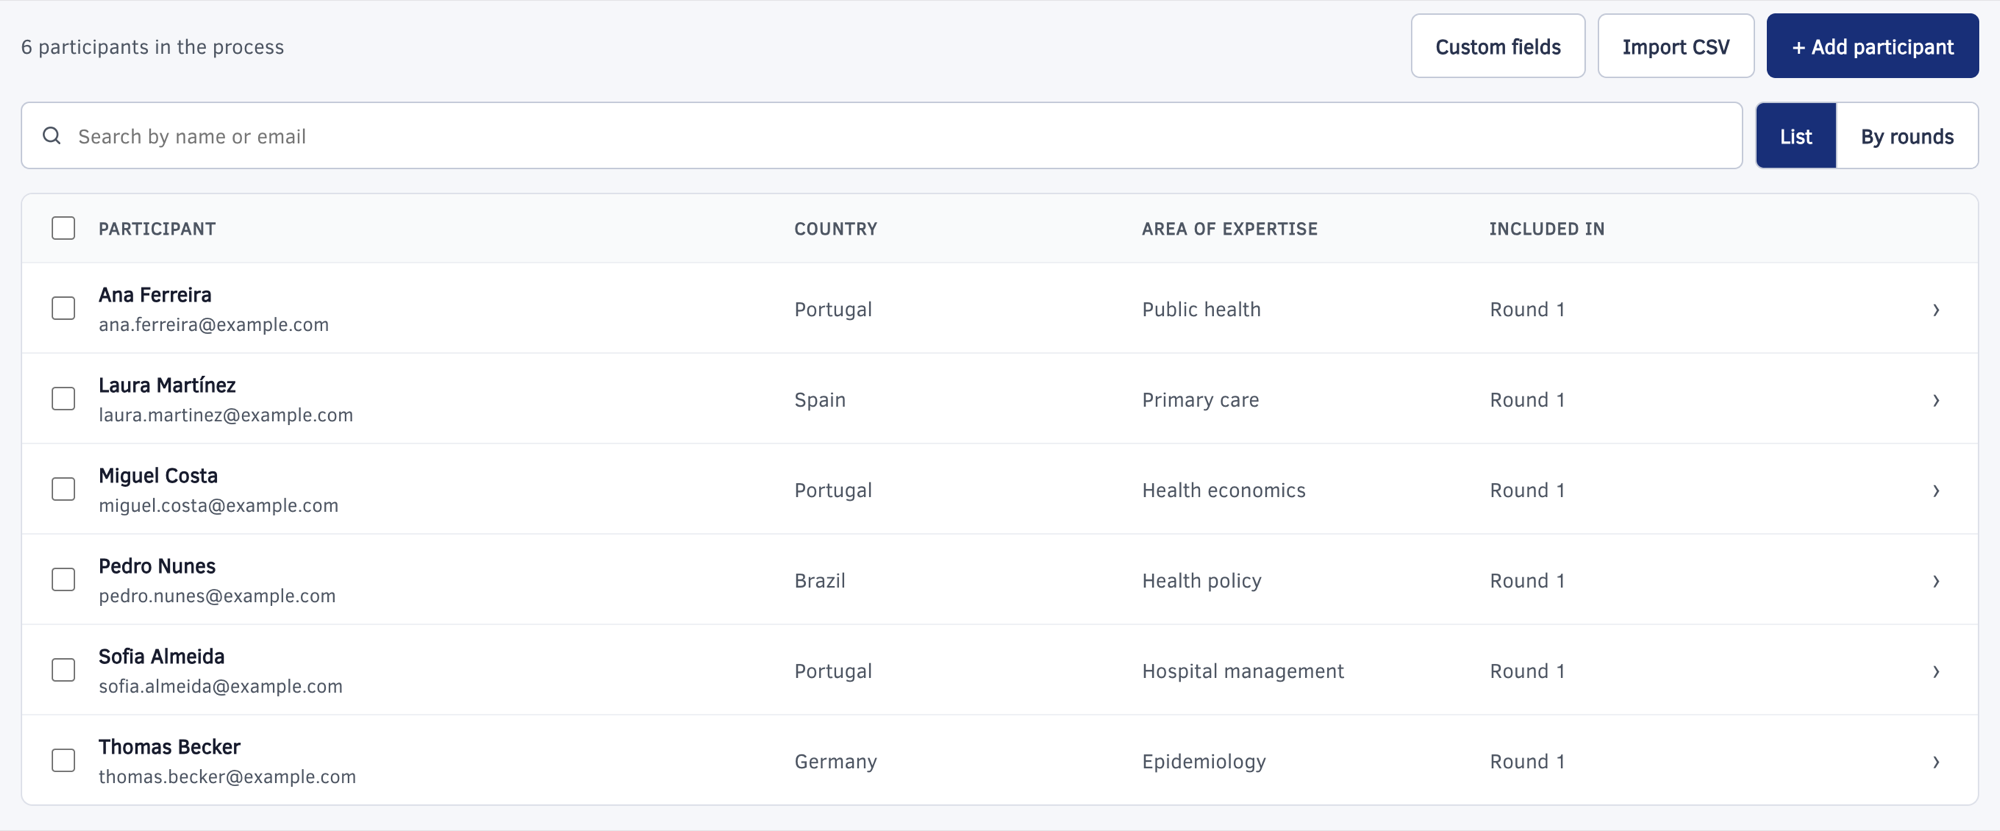
The "Participants" page shows how many participants are in the process and three buttons:
- "Custom fields"
- "Import CSV"
- "+ Add participant"
There are two ways to add your participants: one by one, or by importing a CSV file. You can add as many participants as you want.
Custom fields
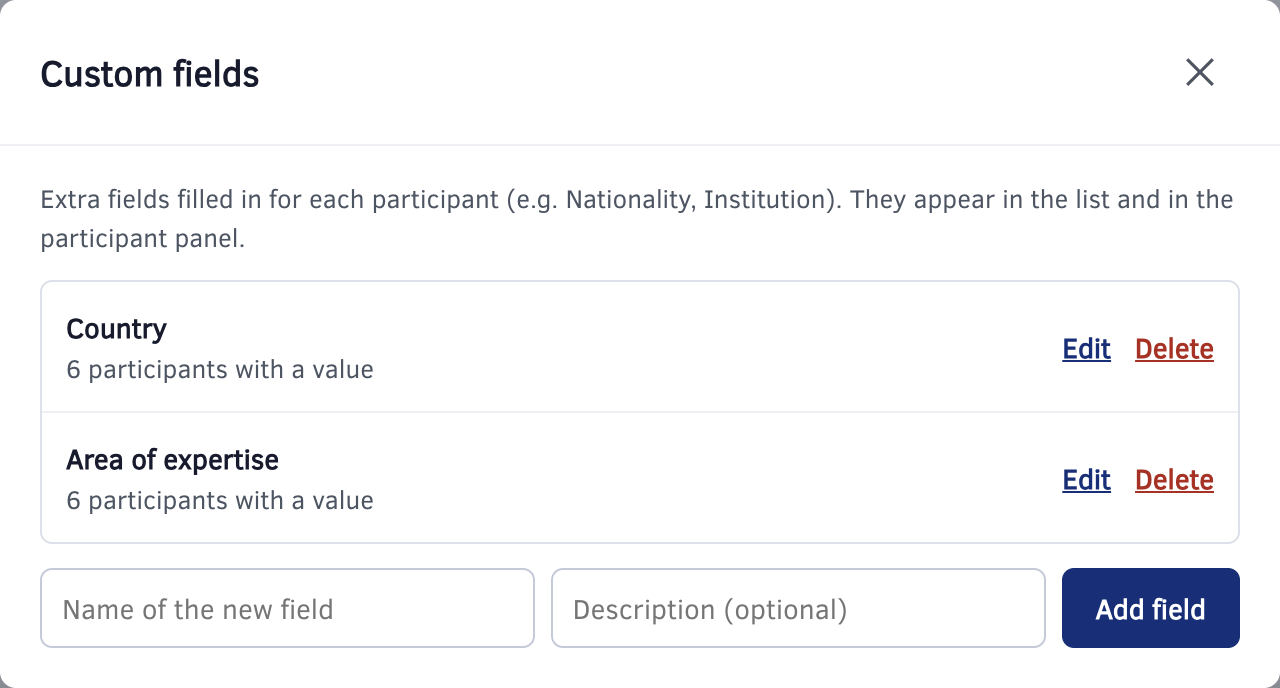
Besides the e-mail address and name, a participant can have custom fields. You create them to add further information about participants (for example, country, institution or area of expertise).
Custom fields can also be used to filter statistics by group (see Letting participants filter statistics by group). It is easier to create them before you add participants, so that you can fill them in as you go.
Adding a custom field
- Click "Custom fields".
- Type the name of the new field and, optionally, a description.
- Click "Add field".
Editing or deleting a field
In the same window you can "Edit" or "Delete" each field. A field used in a statistics filter can't be deleted.
Adding participants one by one
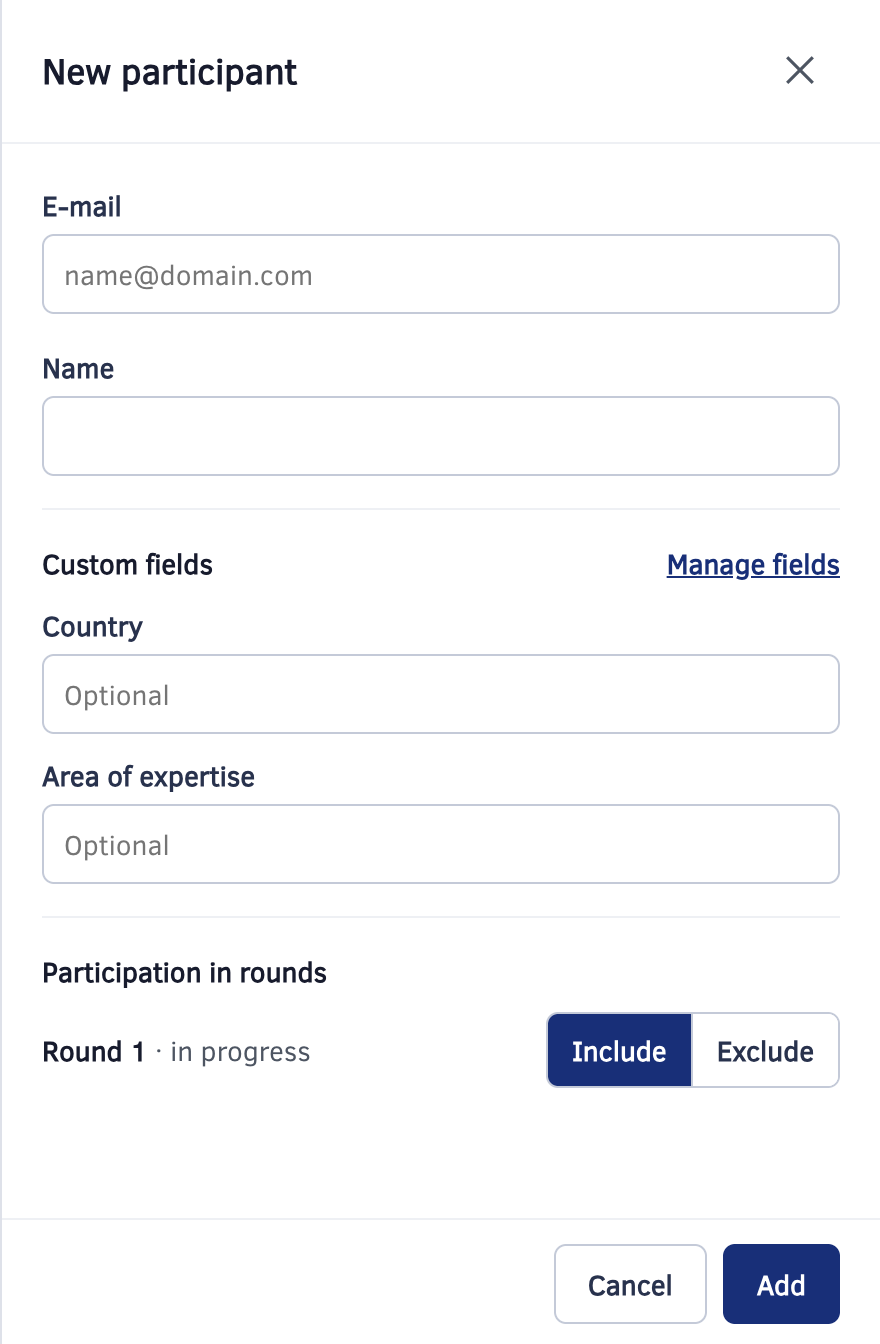
- Click "+ Add participant". The "New participant" panel opens on the right.
- Type the participant's "E-mail" and "Name". Both are required.
- If you created custom fields, fill them in under "Custom fields" (they are optional). Click "Manage fields" to create a new field without leaving the panel.
- Under "Participation in rounds", choose "Include" or "Exclude" for each round.
- Click "Add".
If the participant is already registered in Welphi (for example, because they answered another Welphi questionnaire), their account is reused.
Editing a participant
- Click the arrow (›) at the end of the participant's row, in either view. The "Edit participant" panel opens.
- Change what you need.
- Click "Save".
For data protection reasons, the name and e-mail can't be changed once the participant's account is active or the participant takes part in other processes. Welphi then shows "The name and email can't be changed: the account is already active or takes part in other processes."
Only the participants themselves can then change their name.
The participants list
Views
The list has two views:
- "List" – shows each participant's name, e-mail, custom fields and the rounds they are included in ("Included in").
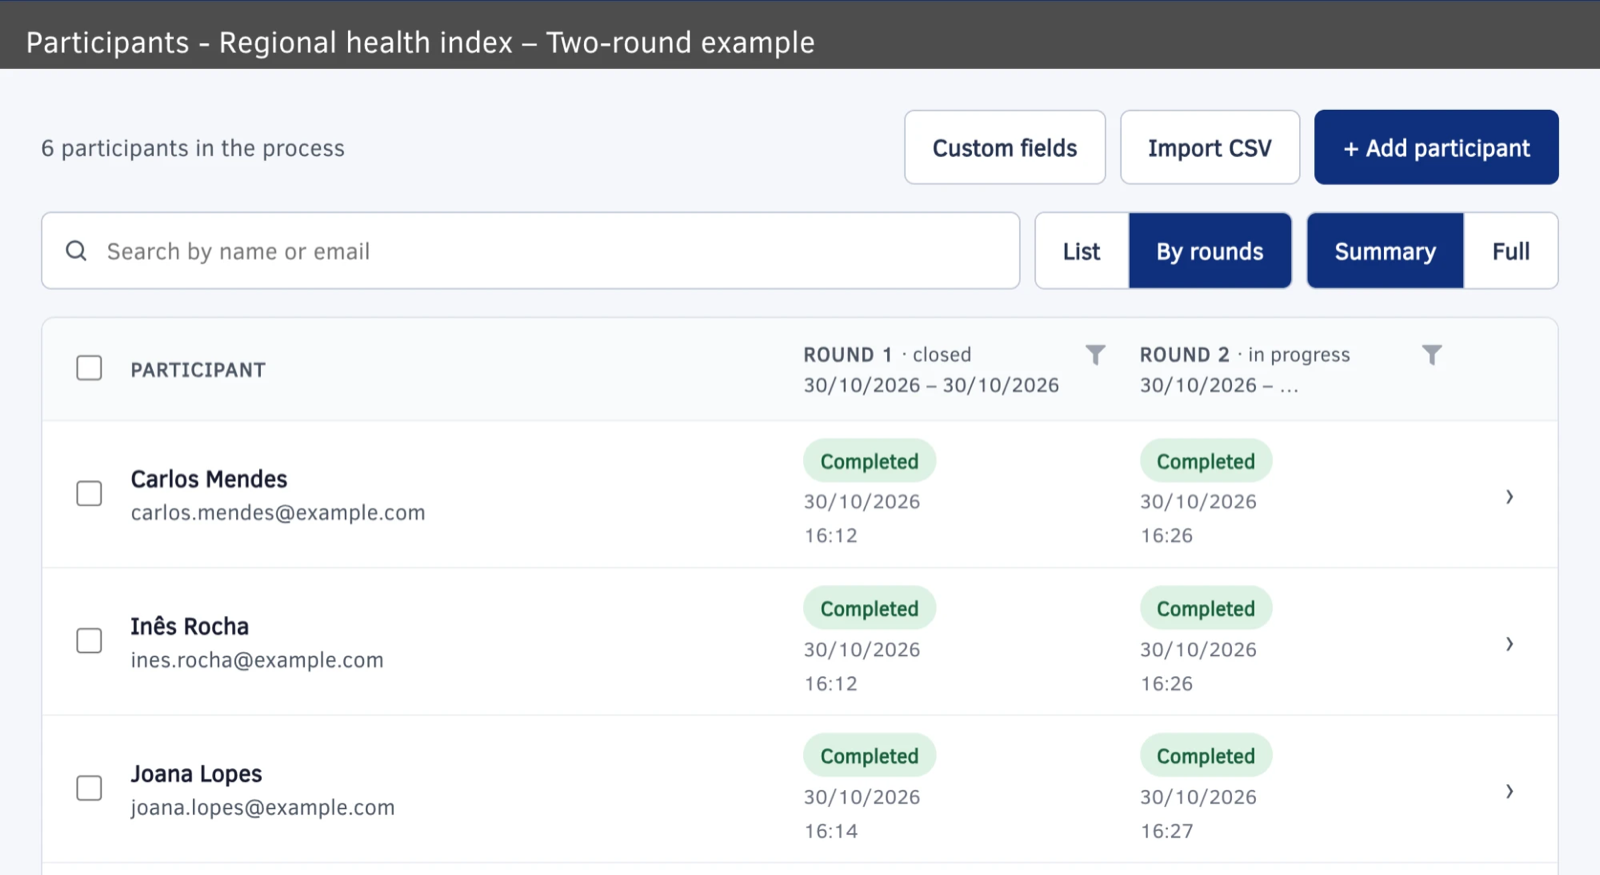
- "By rounds" – shows whether each participant is included in each round. Choose "Summary" to see one column per round, or "Full" to also see, for each round, when the participant was "Invited by e-mail", "Started" and "Completed".
Search
Use the search box ("Search by name or email") to find a participant.
Including or excluding participants from a round
In the "By rounds" view, click a cell to change that participant's participation in that round. Please keep in mind:
- Only the last round can be changed while it isn't running, and only for participants who haven't started it.
- In a running round, participants can only be included, not excluded.
Acting on several participants at once
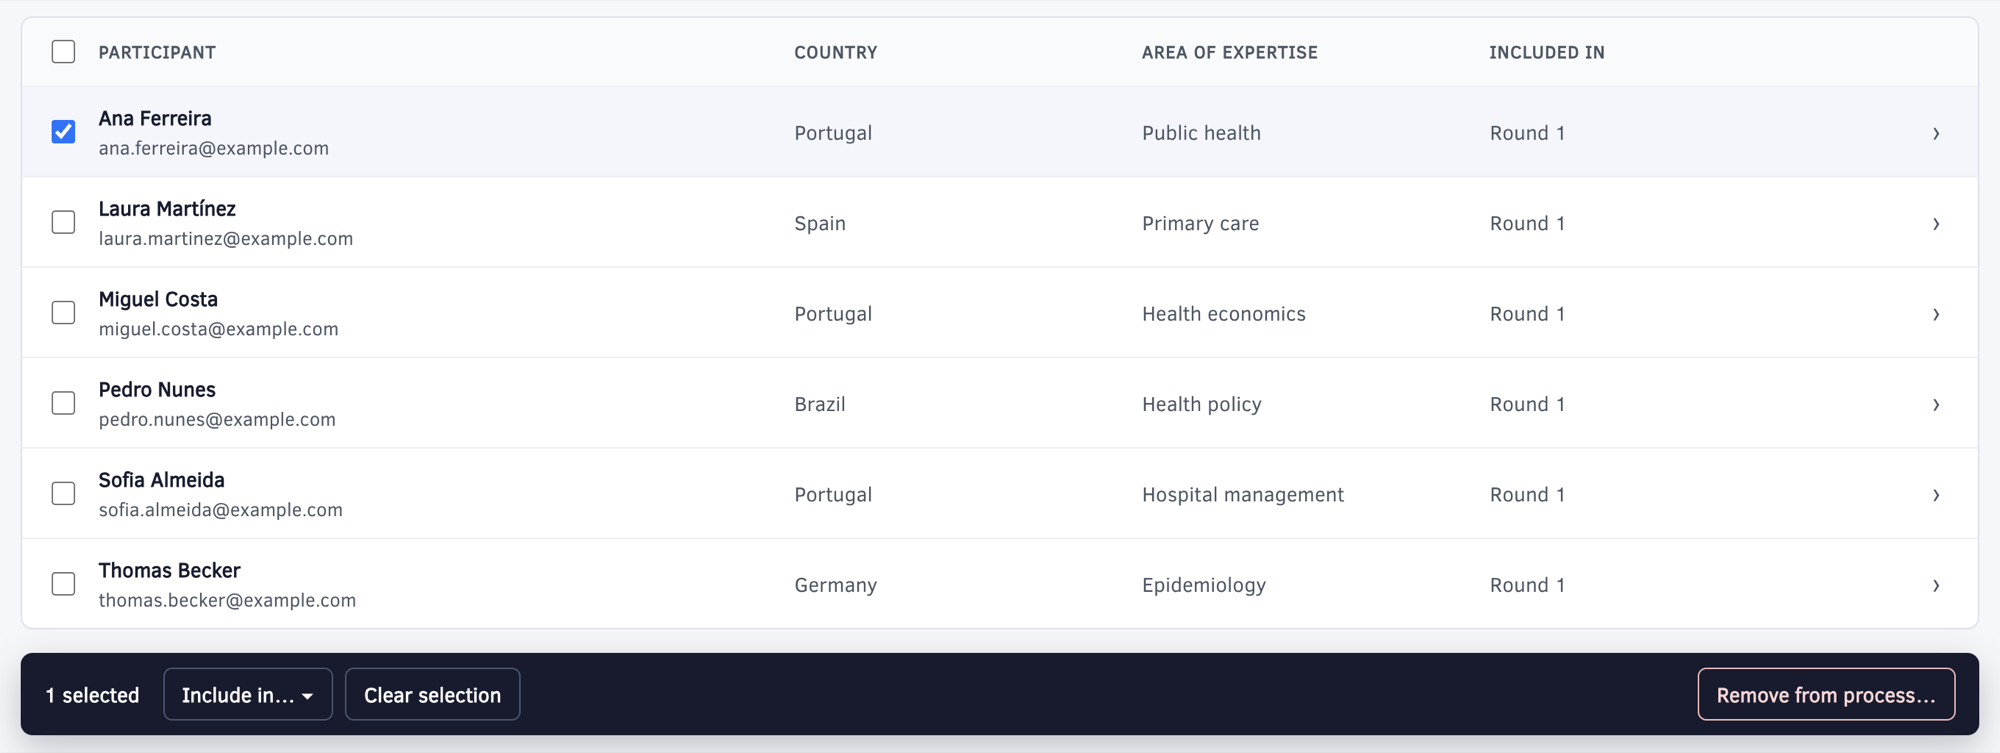
- Check the box next to each participant (or the box in the header to select everyone).
- Choose an action in the bar that appears at the bottom of the list.
The bar has these actions:
- "Include in…"
- "Exclude from…"
- "Clear selection"
- "Remove from process…"
Removing a single participant
Open the participant's panel and click "Remove from process…".
Importing participants from a CSV file
When you have a long list of participants, import them all at once from a CSV file.
Choosing the file
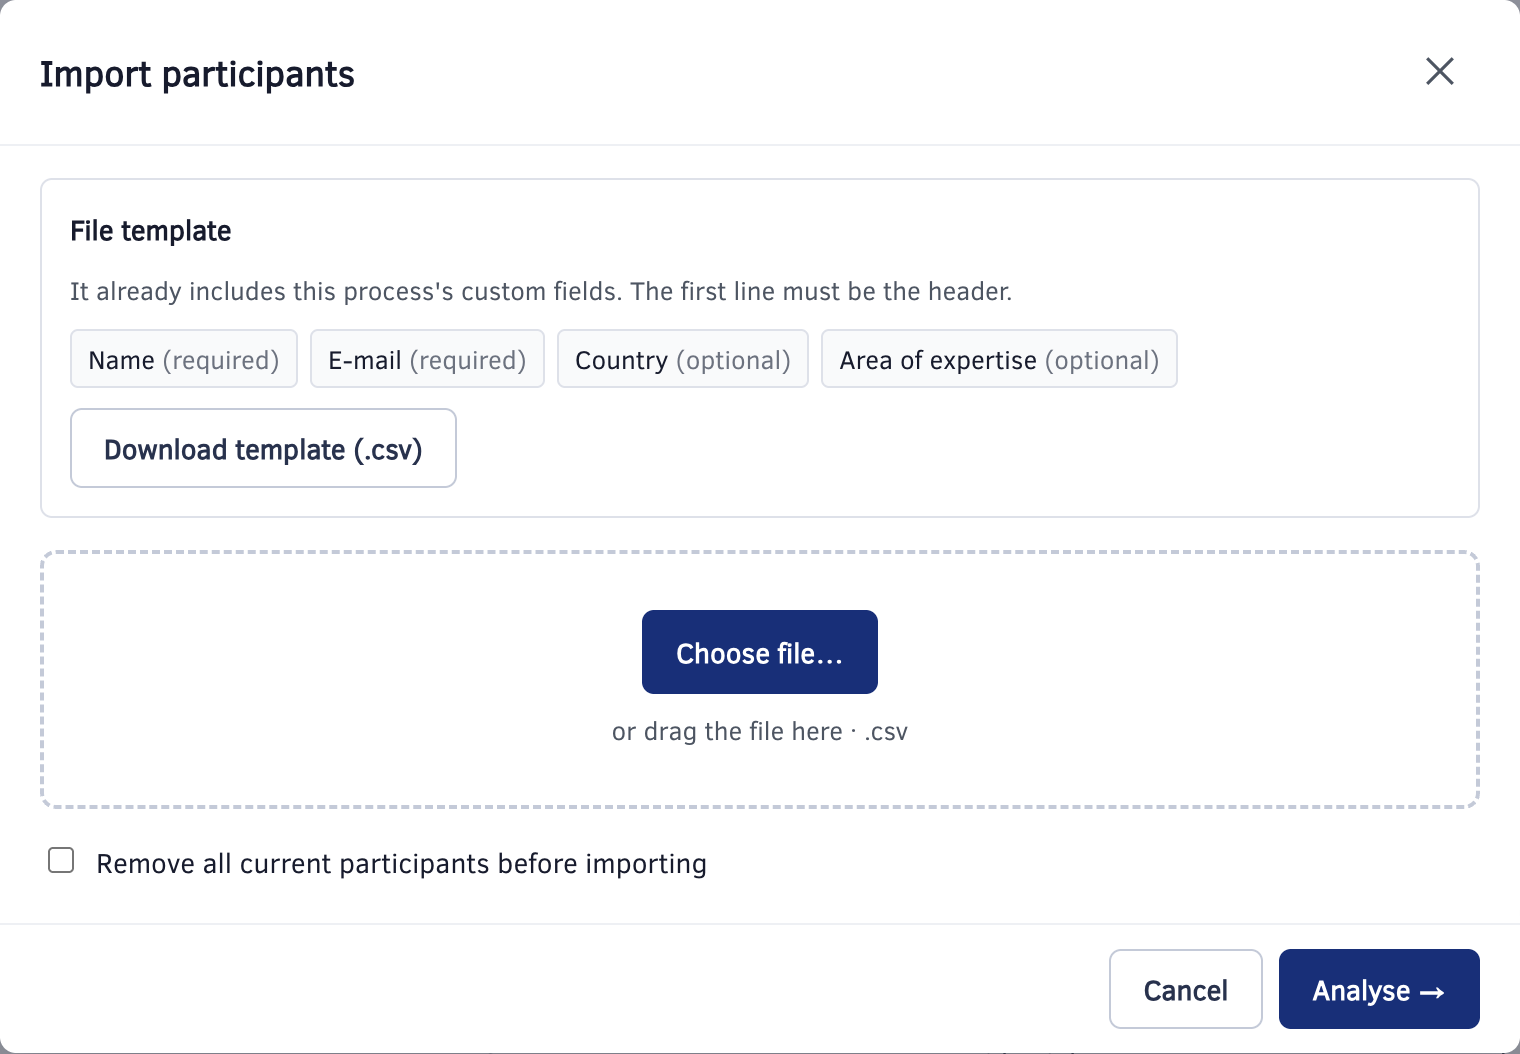
- Click "Import CSV". The "Import participants" window opens.
- Under "File template", check the columns Welphi expects (see below). Click "Download template (.csv)" to get a file with these headers.
- Fill in the template in Excel or another spreadsheet, one participant per line, and save it as CSV.
- Click "Choose file…" (or drag the file into the window).
- If you want to replace the current list, check "Remove all current participants before importing".
- Click "Analyse →".
The file template
The template has these columns:
- "Name" – required.
- "E-mail" – required.
- One column for each custom field of this process – optional.
The first line of your file must be the header.
Welphi detects the separator (comma, semicolon…) and the encoding automatically, so you don't need to check them yourself. Files exported from Excel that are not in UTF-8 are fixed automatically; check the names in the preview.
Checking the preview
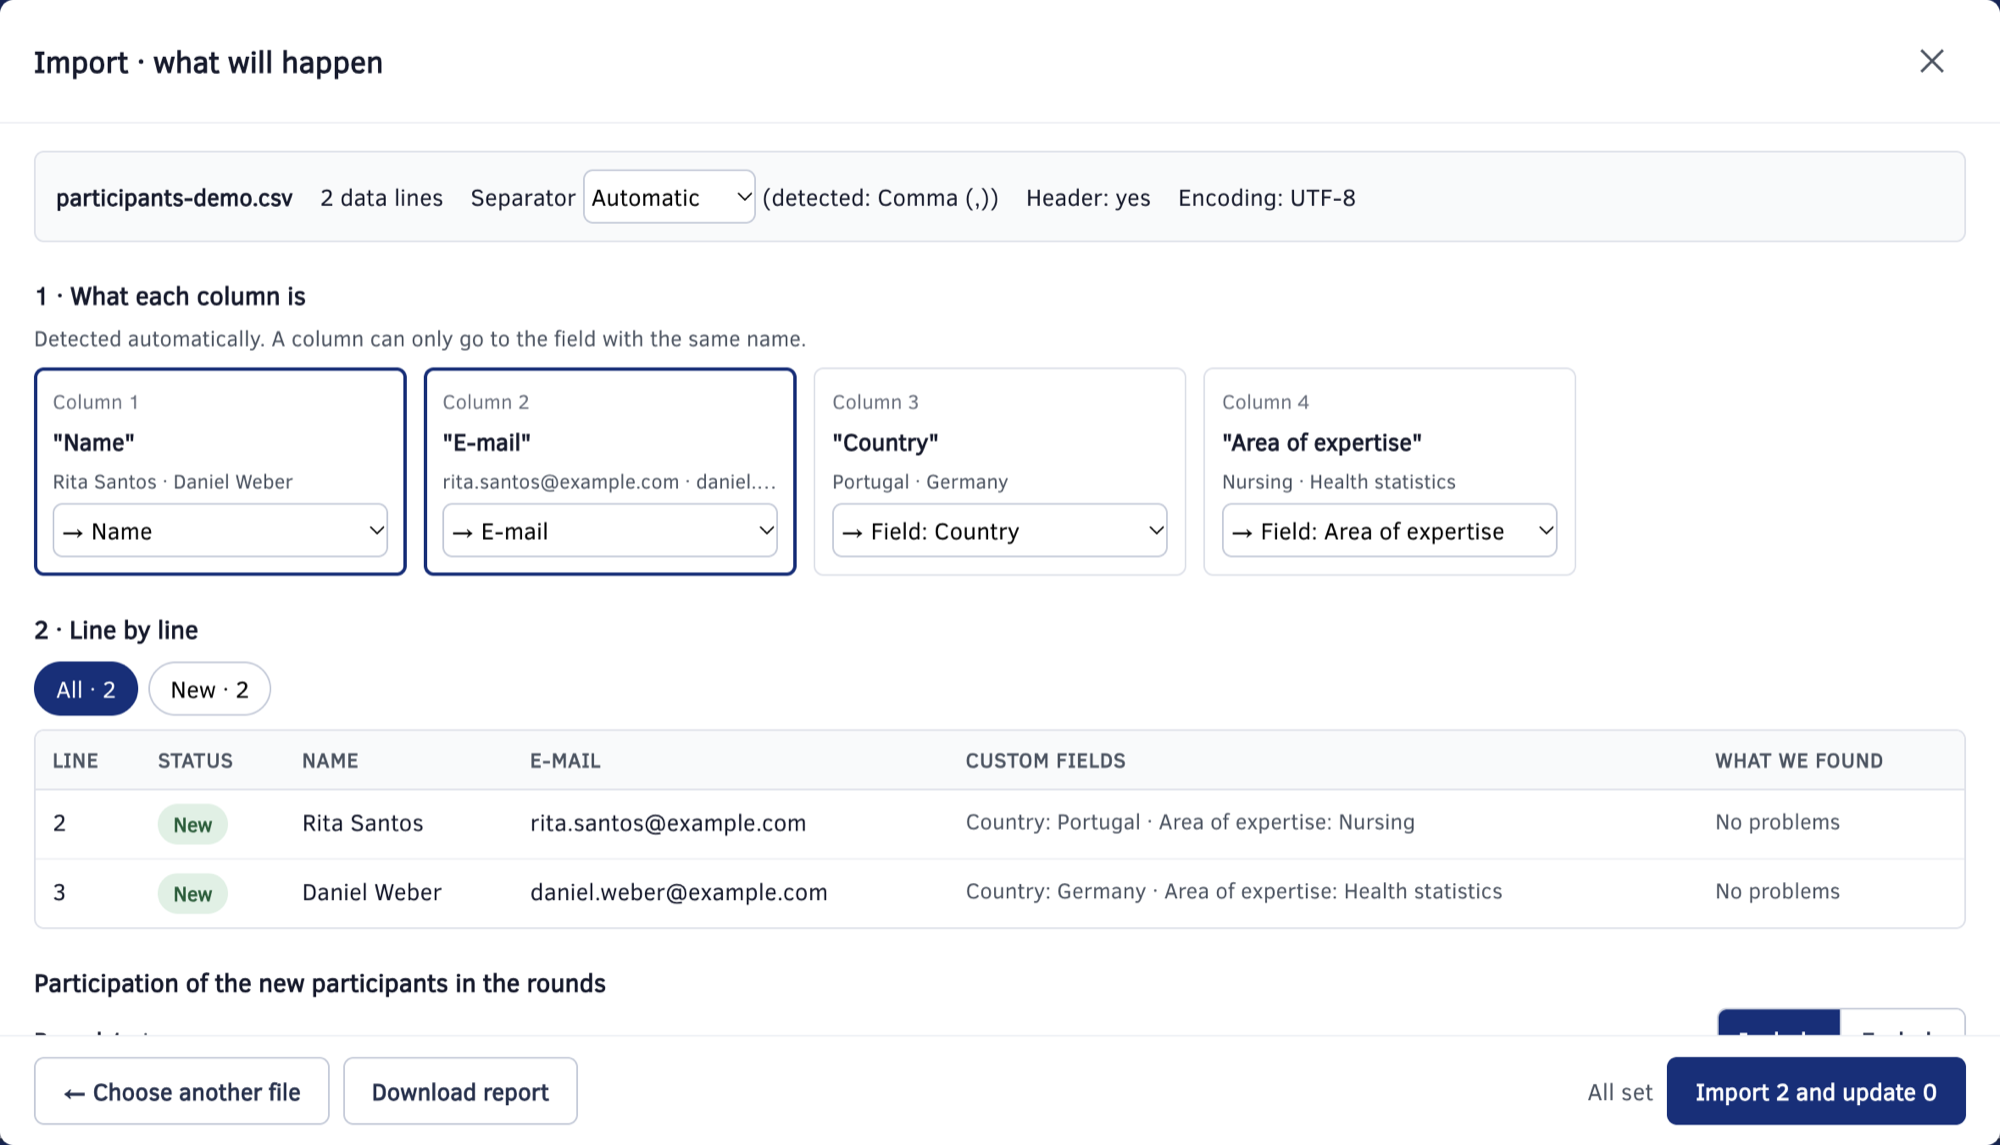
Welphi then shows what will happen ("Import · what will happen"):
- File details – the file name, number of data lines, separator ("Automatic", with the detected separator), header and encoding.
- "What each column is" – the field each column will be imported to, with sample values. A column can only go to the field with the same name.
- "Line by line" – every line of the file, with filters such as "All" and "New", so you can check names and e-mails before importing. Lines with problems (for example, a repeated line or a repeated column name) are flagged here.
Finishing the import
From the preview, you can:
- "Download report" – keep a copy of this check.
- "← Choose another file" – start again.
- The import button (for example "Import 2 and update 0") – import the new participants and update the existing ones.
That's it! All your participants are added, with the information in the file.