
Importing indicators into a qualitative page
In a qualitative page, participants use a scale to answer your question for a set of items in a table. This article shows how to add these items to your page, one by one or from a .csv file.
Overview
The items can be indicators, criteria, strategies, policies or whatever you want your participants to rate. In Welphi, we use the term indicators for these items.
The list of indicators can include just a few items or a large number. In any case, you can insert your indicators in two ways:
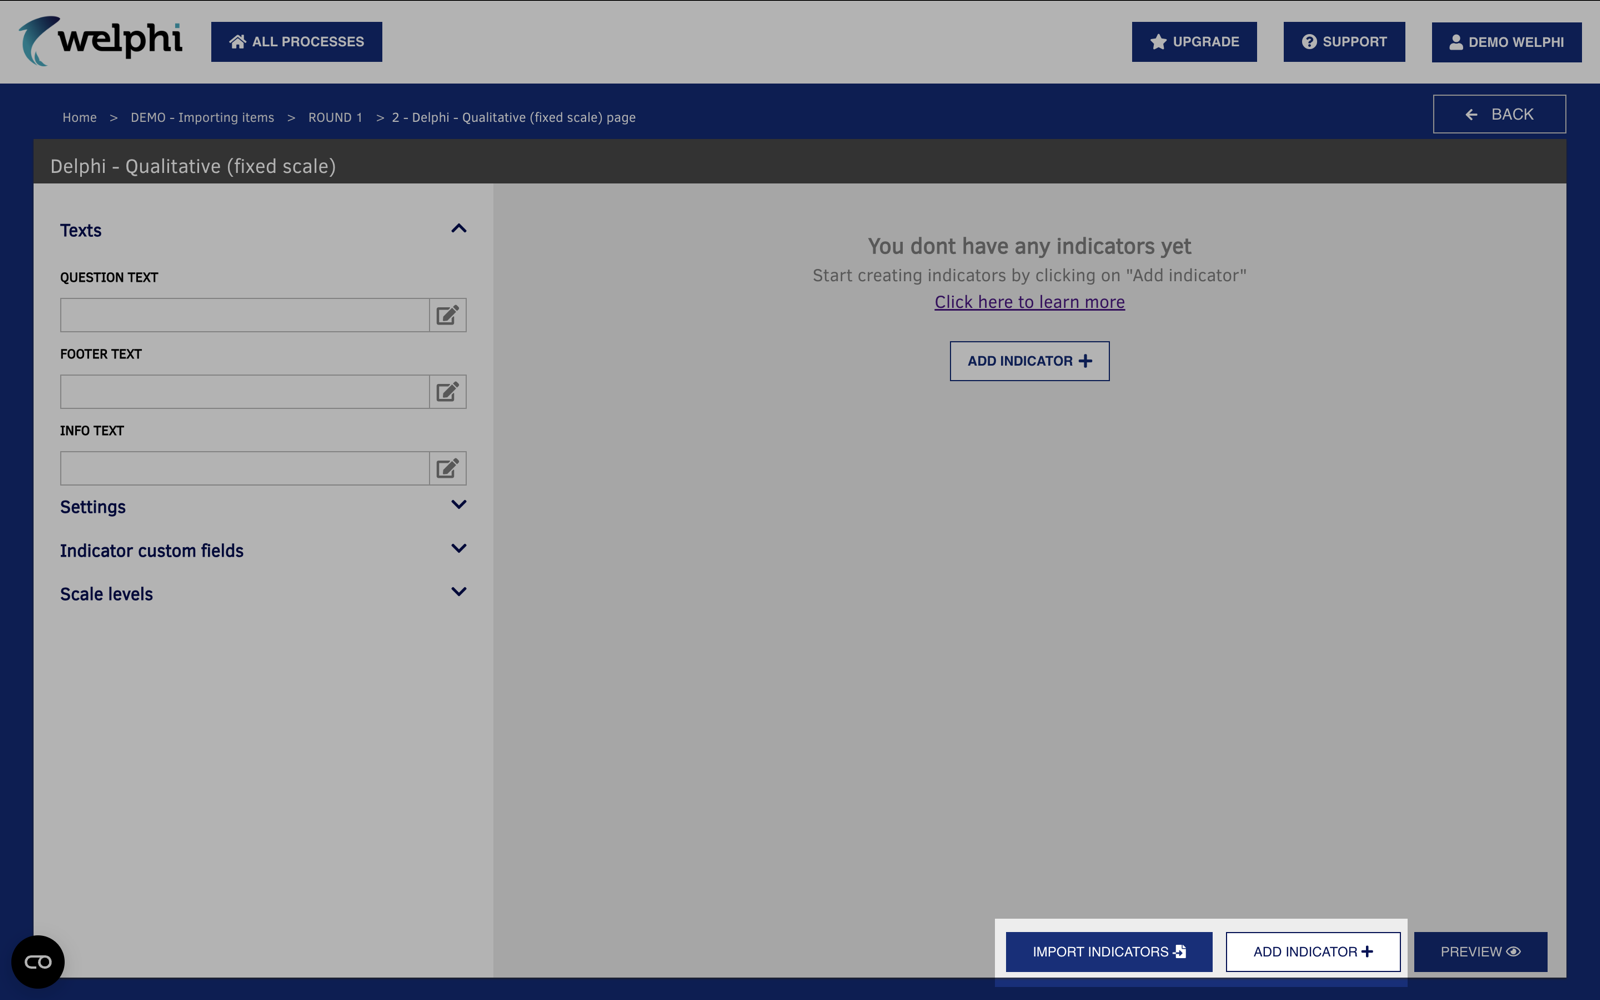
- Manually – one by one, with the "ADD INDICATOR" button.
- Automatically – from a .csv file, with the "IMPORT INDICATORS" button.
When setting up a qualitative page, you will see both buttons at the bottom of the screen.
Insert indicators manually
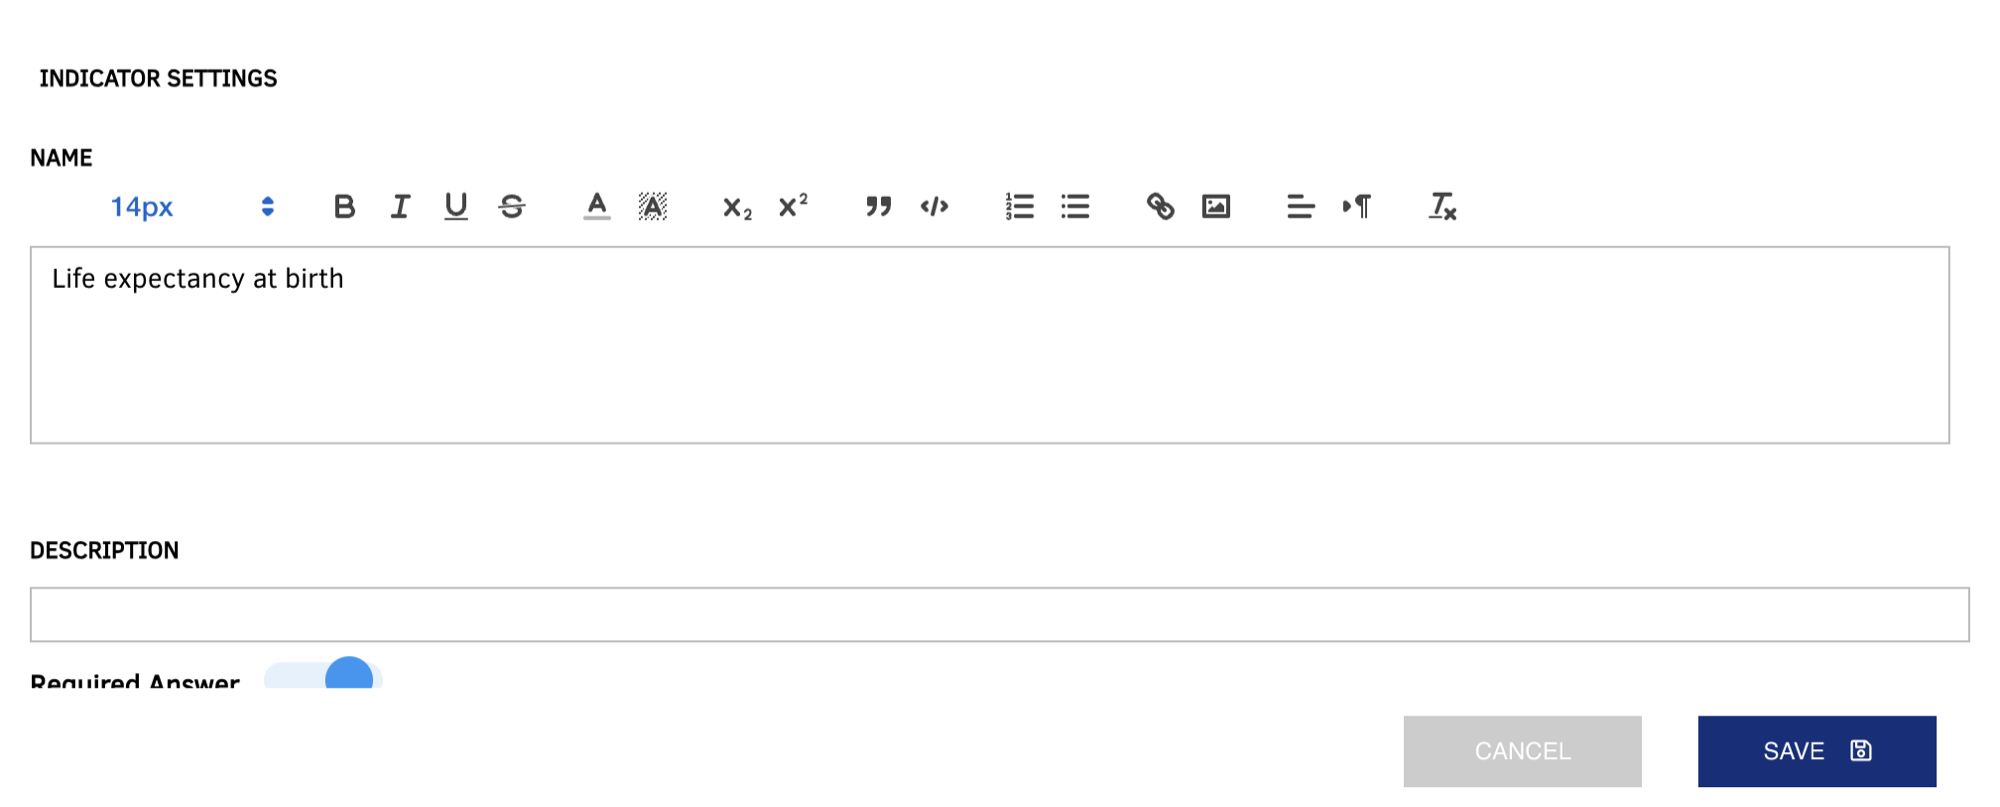
To insert indicators manually (i.e., one by one), click the "ADD INDICATOR" button for each item to be added. This opens the "Indicator settings" window.
The Indicator settings window
In this window you set:
- Name – you can format it, and add links or images to it.
- Description – the indicator's description.
- "Required Answer" – whether an answer is required.
- Custom indicator fields – if you have previously created custom indicator fields, you will also be able to fill in that information for the indicator.
The indicators list
By filling in the appropriate information and repeating these steps for 10 items, you will end up with a list like the one below.

Upload indicators from a .csv file
When you have a large list of elements to insert into Welphi, you can use the upload feature through the "IMPORT INDICATORS" button. All you need to do is to organize all your indicators in a CSV file format.
1. Prepare your Excel file
To create your .csv file, you will probably start with an Excel file and then export your data into a .csv file. To properly format your Excel file (and later save it as .csv), follow these simple steps:
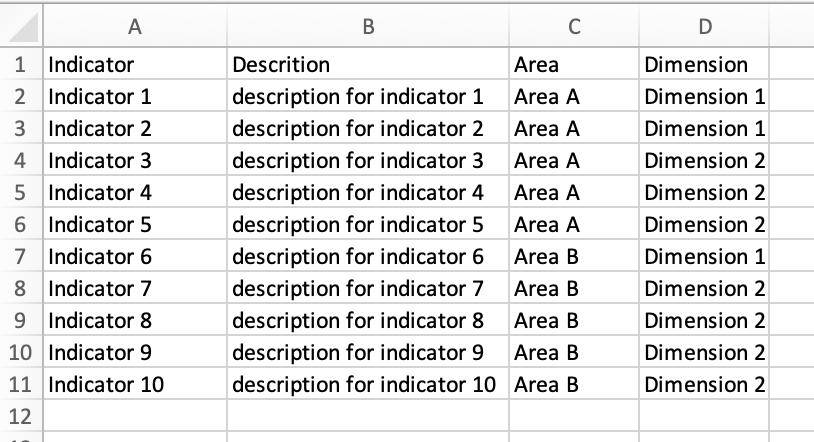
- Make sure that the first row of the Excel file contains the column headers. You need to have at least two columns in your file, labeled as: "name" and "description".
- Insert your indicators' names in the first column.
-
Insert your indicators' descriptions in the second column.
Note: Even if you don't have descriptions for your indicators, you still need to have this column and its header, leaving all cells empty.
-
If you also want to import additional fields of information, just use the third column and onwards (one column per field). Don't forget to also add the column header for each field.
Template files
To make it easier to create your .csv files, you can download one of our template Excel files:
- Without custom indicator fields – click here: Indicators
- With two custom indicator fields called "Area" and "Dimension" – click here: Indicators with custom fields
2. Save it as .csv
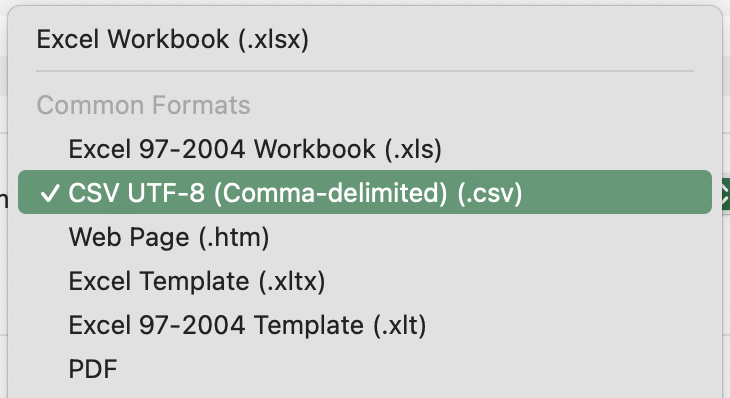
Once you have your Excel file ready, you just need to save it, selecting "CSV UTF-8 (Comma-delimited) (.csv)" as the file format.
3. Check the delimiter
Please keep in mind that despite the format name, Excel will decide whether to use a comma or any other delimiter based upon your computer language.
Because of this, always check the file delimiter used:
- Open the newly created .csv file with a text editor.
- Check which character is being used to split the information in the first row.

4. Import the file
Now that you have created your file and made sure which delimiter is being used, you can start uploading your .csv file.
-
Click the "IMPORT INDICATORS" button at the bottom of the page to open the dialogue box.
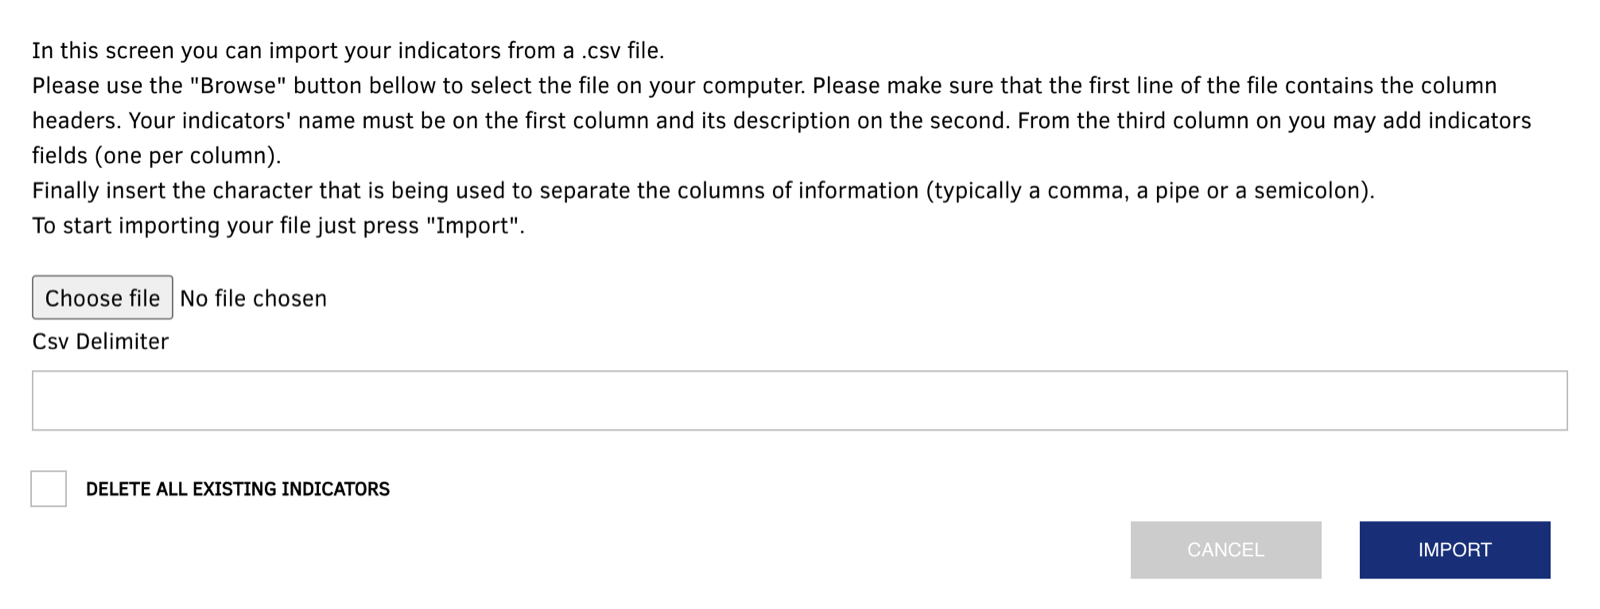
Import items dialog -
Click the "Choose file" button and locate your CSV file on your desktop.
- Once you have selected your file, type the delimiter character being used in your .csv file into the "Csv Delimiter" box.
- Decide whether you want to delete the indicators already on your page ("DELETE ALL EXISTING INDICATORS").
- Click "IMPORT".
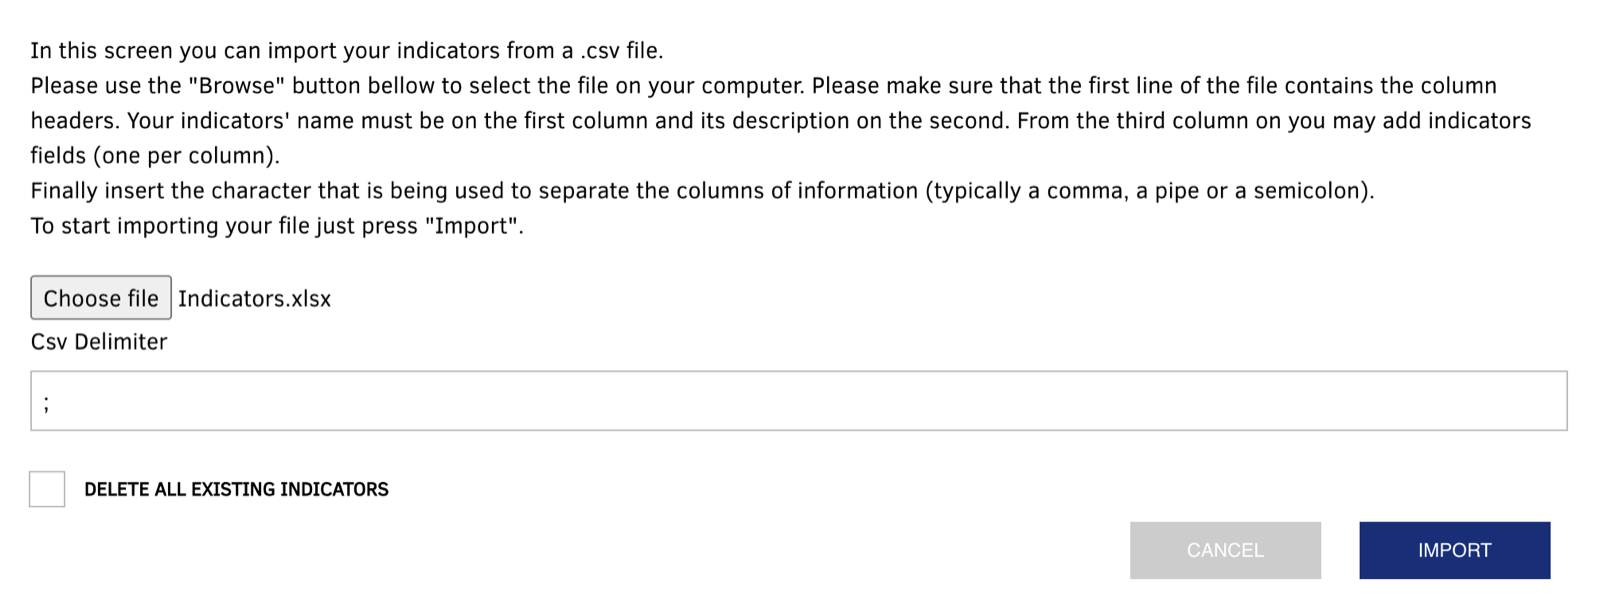
That's it! All your indicators were inserted and filled with the information on the file.
Note: you are still allowed to make edits to all your indicators or custom fields without the need to upload a new version of your CSV file.
Existing custom fields
Important: Although you can set Welphi to delete any indicators already existing in your page when uploading new ones, you can't do the same with the "custom fields" already existing in your page, even if you are about to upload a file with the same custom fields. Therefore, please make sure you delete any "custom fields" already existing in the page.
After adding your indicators
Regardless of the way you choose to insert the indicators and their data, you can now see:
- a list of all the indicators on the right-hand side of the screen;
- the list of "custom fields" on the left-hand side panel, under "Indicator custom fields".
To learn more about setting up the page, see Setting up a qualitative (fixed scale) page.